✓ Sourdough relies on a natural leavening agent (starter) instead of commercial yeast.
✓ The process requires patience, often spanning 12-24 hours from mixing to baking.
✓ Proper hydration and gluten development are crucial for a good crumb structure.
✓ Baking in a Dutch oven creates the ideal environment for a crispy crust and soft interior.
How It Works
1
Prepare Your Sourdough Starter
A healthy, active sourdough starter is the foundation of your bread. Feed it regularly until it consistently doubles in size within 4-8 hours.
2
Mix and Autolyse the Dough
Combine flour and water, then let it rest for 30-60 minutes. This 'autolyse' step allows the flour to fully hydrate and gluten to begin forming naturally.
3
Fold, Bulk Ferment, and Shape
Incorporate salt and starter, then perform a series of gentle folds over several hours. This builds strength, followed by shaping and a cold proof to develop flavor.
4
Bake to Perfection
Preheat your Dutch oven to a high temperature, then bake your loaf covered for the initial phase to trap steam, and uncovered to achieve a beautiful, crispy crust.
Understanding the Magic: Your Sourdough Starter
Photo: Travel with Lenses / Pexels
Before you can even think about how to make sourdough bread at home, you absolutely must have a vibrant, active sourdough starter. This isn't just an ingredient; it's a living culture of wild yeasts and bacteria, captured from the air and flour around you. Think of it as the heart and soul of your sourdough, responsible for its distinctive tangy flavor, airy texture, and incredible keeping qualities. Creating a starter from scratch is a rewarding process, typically taking 5-7 days, involving a simple mixture of flour and water, fed regularly. Each feeding replenishes the microbes, encouraging them to multiply and become strong enough to leaven bread. A healthy starter will show consistent signs of activity: it will bubble vigorously, smell pleasantly yeasty and slightly sour, and reliably double or triple in size after feeding. If your starter isn't performing, don't despair; it often just needs more consistent feeding or a warmer environment. Maintaining your starter is an ongoing commitment, but it's a small price to pay for the incredible bread it produces. Store it in the refrigerator if you're not baking frequently, feeding it once a week, or keep it on the counter with daily feedings if you're a regular baker. The type of flour you use for your starter can also influence its character. Many bakers prefer organic whole wheat or rye flour for initial development due to their higher nutrient content, which provides ample food for the microbes. Once established, you can often switch to all-purpose or bread flour for maintenance. The consistency of your starter should resemble a thick pancake batter, ensuring it's not too dry (which inhibits activity) or too wet (which can dilute its strength). There are numerous online guides and communities dedicated to starter creation and troubleshooting, offering a wealth of knowledge to help you on your journey. Remember, patience is key; a strong starter is built over time and consistent care. It's truly the foundational step in learning the art of sourdough baking. Without a robust and active starter, your efforts to bake sourdough will likely fall flat, literally. So, invest your time and attention here, and you'll be richly rewarded with incredible loaves.
The Sourdough Process: From Mix to Bulk Ferment
Photo: Feyza Daştan / Pexels
Once your starter is bubbly and active, you're ready to begin the main event of how to make sourdough bread at home: mixing your dough. The first step, often called the 'autolyse,' is deceptively simple but incredibly powerful. You combine just the flour and water for your recipe and let it rest, typically for 30 minutes to an hour. This resting period allows the flour to fully hydrate, and enzymes naturally present in the flour begin to break down starches and proteins, kickstarting gluten development without any mechanical effort. This leads to a more extensible and manageable dough. After the autolyse, you'll incorporate your active starter and salt. Salt is crucial not only for flavor but also for controlling fermentation and strengthening the gluten network. Mix these ingredients thoroughly until no dry flour remains and the dough is shaggy. The next critical phase is 'bulk fermentation,' also known as the first rise. This is where the magic of the starter truly comes alive, consuming sugars in the dough and producing carbon dioxide, which creates those beautiful air pockets, and organic acids, which contribute to the distinctive sourdough flavor. During bulk fermentation, you'll perform a series of 'stretch and folds' or 'coil folds.' These gentle manipulations are done every 30-60 minutes for the first few hours. Each fold strengthens the gluten, builds structure, and redistributes the yeast and bacteria, ensuring even fermentation. The number of folds and the total duration of bulk fermentation will depend on several factors: the strength of your starter, the type of flour, and crucially, the ambient temperature of your kitchen. A warmer environment will accelerate fermentation, while a cooler one will slow it down. You're looking for visual cues: the dough should increase significantly in volume (often 20-50%), feel airy and alive, and show signs of bubbling on the surface. Learning to read your dough is one of the most important skills in sourdough baking. Don't rely solely on a timer; observe how the dough feels and looks. Over-fermented dough can be sticky and difficult to handle, while under-fermented dough will result in a dense loaf. This phase requires patience and observation, but mastering it is key to achieving that perfect open crumb and robust flavor profile that defines artisan sourdough. It's a dance between time, temperature, and technique.
Shaping, Proofing, and Baking Your Artisan Loaf
Photo: Giovanna Kamimura / Pexels
After the bulk fermentation, your dough is ready for the next crucial steps in how to make sourdough bread at home: shaping and proofing. Gently turn your dough out onto a lightly floured surface. The goal of shaping is to create tension on the surface of the dough, forming a tight 'skin' that will help the loaf hold its structure during baking and provide a beautiful, crispy crust. There are various shaping techniques, but the most common involve folding the edges of the dough towards the center and then gently pulling and rotating it to create a smooth, taut ball or oblong shape. Work quickly but gently to avoid degassing the dough too much. Once shaped, the dough is placed into a floured banneton (a proofing basket) or a bowl lined with a floured cloth, seam-side up. This supports the dough's shape and prevents it from spreading during the final proof. The final proof, or 'retardation,' is typically done in the refrigerator for 8-18 hours. This cold proof serves several purposes: it slows down fermentation, allowing the flavors to deepen and develop complex notes; it makes the dough easier to handle and score; and it helps create a more dramatic oven spring. While a room-temperature final proof is possible, the cold proof is highly recommended for superior flavor and texture. When you're ready to bake, preheat your oven to a very high temperature (usually 450-500°F or 230-260°C) with a Dutch oven inside for at least 30-60 minutes. This ensures the Dutch oven is scorching hot, which is essential for creating steam and achieving a good oven spring. Carefully remove the hot Dutch oven, invert your proofed dough into it, score the top with a sharp blade (lame), and immediately cover it. Scoring isn't just for aesthetics; it allows the dough to expand predictably during baking. The covered baking period (typically 20-25 minutes) traps steam released from the dough, keeping the crust soft and allowing the loaf to expand fully before the crust sets. After this initial bake, remove the lid and continue baking for another 20-30 minutes, or until the crust is deeply golden brown and the internal temperature reaches around 200-210°F (93-99°C). This uncovered phase allows the crust to crisp up beautifully. Once baked, transfer the loaf to a wire rack to cool completely for at least 1-2 hours before slicing. Slicing too early can result in a gummy texture, as the internal structure is still setting. This entire process, from shaping to the final cooling, is what transforms simple ingredients into an extraordinary loaf of delicious homemade bread.
Troubleshooting & Tips for Sourdough Success
Photo: Travel with Lenses / Pexels
Embarking on the journey of how to make sourdough bread at home can sometimes feel like a delicate dance, but understanding common pitfalls and having a few tricks up your sleeve can make all the difference. One of the most frequent issues bakers encounter is a dense, flat loaf. This can often be attributed to an under-active starter, insufficient gluten development during bulk fermentation, or under-proofing. Ensure your starter consistently doubles after feeding, perform enough stretch and folds to build strength, and learn to recognize the signs of a properly proofed dough (it should feel airy and spring back slowly when poked). Conversely, an over-proofed dough will be difficult to handle, very sticky, and may collapse in the oven, resulting in a flat, gummy loaf. Pay close attention to temperature and time during bulk and cold proofing. Kitchen temperature drastically affects fermentation speed; warmer means faster. If your crust isn't as crispy as you'd like, ensure your Dutch oven is adequately preheated and that you're baking covered for long enough to generate steam, followed by sufficient uncovered baking time to develop color and crispness. For a beautiful ear (the blistered, risen flap on the crust), your dough needs good tension from shaping, proper scoring technique, and adequate oven spring. Don't be afraid to experiment with your scoring angle and depth. Hydration levels also play a significant role. Higher hydration doughs (more water relative to flour) tend to have a more open, airy crumb but can be more challenging to handle. Start with a moderate hydration (around 70-75%) and gradually increase as you gain confidence. Remember that different flours absorb water differently, so you may need to adjust slightly. Finally, embrace the learning process. Sourdough baking is as much an art as it is a science, and every loaf offers an opportunity to learn. Keep a baking journal to track variables like flour type, hydration, fermentation times, and ambient temperature. This will help you identify what works best in your kitchen and with your starter. Don't get discouraged by imperfect loaves; even a 'failed' sourdough is often still delicious. The journey of mastering homemade sourdough is incredibly rewarding, yielding not just bread but a deeper connection to the food you eat.
**Key Sourdough Tips:**
* **Maintain a strong starter:** Feed it consistently and keep an eye on its activity.
* **Read your dough, not just the clock:** Learn to recognize visual and tactile cues for fermentation.
* **Don't skip the autolyse:** It's a simple step with big benefits for gluten development.
* **Gentle handling:** Avoid degassing your dough too much, especially during shaping.
* **Preheat your Dutch oven thoroughly:** Essential for oven spring and crust development.
* **Cool completely:** Patience here prevents a gummy interior.
* **Experiment with flours:** Different flours offer unique flavors and textures.
* **Keep a baking journal:** Track your progress and learn from each bake.
* **Embrace imperfections:** Every loaf is a step on your sourdough journey.
Comparison
Feature
Sourdough (Homemade)
Commercial Yeast Bread
Store-Bought Sourdough
Leavening Agent
Natural Sourdough Starter
Commercial Baker's Yeast
Often Commercial Yeast + Flavorings
Flavor Profile
Complex, Tangy, Deep
Milder, Yeasty
Varies, often less complex
Digestion
Easier (fermentation)
Standard
Varies
Process Time
12-24 hours (patience required)
2-4 hours (quicker)
N/A
Ingredient Control
✓ (know exactly what's in it)
✓ (know exactly what's in it)
✗ (may contain additives)
Cost per Loaf
Low (flour, water, salt)
Low (flour, water, yeast, salt)
High ($5-$10+)
What Readers Say
★★★★★
"This guide finally helped me understand how to make sourdough bread at home! My first loaf had an incredible crust and open crumb. The starter section was particularly helpful for getting mine super active."
Sarah J. · Austin, TX
★★★★★
"I've tried several sourdough recipes, but this one broke down the 'why' behind each step so well. My bread used to be dense, but now it's light and airy. Highly recommend for any home baker."
Mark D. · Seattle, WA
★★★★★
"Following these instructions, I consistently bake two perfect sourdough loaves every week. The tips on bulk fermentation and cold proofing were game-changers for my crumb structure and flavor development."
Emily R. · Denver, CO
★★★★★
"A very thorough guide on how to make sourdough bread at home. While my first attempt wasn't perfect, the detailed troubleshooting section helped me identify my mistakes for the next bake. It's an ongoing learning curve, but this article set me on the right path."
David L. · Chicago, IL
★★★★★
"I started baking sourdough to improve my gut health, and this guide made the process approachable and fun. My family loves the homemade bread, and I feel great knowing exactly what ingredients are in it."
Jessica M. · Portland, OR
Frequently Asked Questions
What's the most important factor when learning how to make sourdough bread at home?
The most crucial factor is having a strong, active sourdough starter. Without a vibrant starter that consistently doubles in size, your bread won't rise properly. Patience and consistent feeding are key to developing and maintaining a healthy starter, which forms the foundation of excellent sourdough.
Is making sourdough bread at home difficult for beginners?
While sourdough baking has a reputation for being complex, it's very accessible for beginners with the right guidance. It requires patience and attention to detail rather than advanced skills. Start with a reliable recipe, understand each step, and don't be afraid of imperfect first loaves – every bake is a learning experience.
How do I know if my sourdough starter is ready to use?
Your sourdough starter is ready when it consistently doubles or triples in volume within 4-8 hours after feeding, shows numerous bubbles on the surface and sides, and smells pleasantly sour and yeasty. A good 'float test' (a small spoonful floats in water) is a good indicator, but visual cues are often more reliable.
Is it cheaper to make sourdough bread at home than to buy it?
Yes, significantly. The primary ingredients for sourdough are flour, water, and salt, which are very inexpensive. While there's an initial investment in a Dutch oven or banneton, the cost per loaf for homemade sourdough is dramatically lower than buying artisan loaves from a bakery, which can range from $5 to $10 or more.
How does homemade sourdough compare to store-bought 'sourdough'?
Authentic homemade sourdough, leavened solely by a natural starter, offers a depth of complex flavor, superior texture, and potential digestive benefits that most store-bought 'sourdough' breads cannot match. Many commercial versions use baker's yeast for speed and only add sourdough flavoring or a small amount of starter, resulting in a less nuanced product.
Who should consider making sourdough bread at home?
Anyone who enjoys delicious, artisan-quality bread, is interested in traditional food preparation, or wants to control the ingredients in their food should consider making sourdough at home. It's also great for those looking for a rewarding hobby and a way to bring fresh, wholesome bread to their family table.
What are the risks if I don't follow the recipe precisely?
Deviating too much from a sourdough recipe can lead to various issues. Incorrect hydration can make the dough too sticky or too stiff. Improper fermentation times can result in a dense (under-proofed) or collapsed (over-proofed) loaf. While sourdough is forgiving, significant changes, especially in starter activity, can impact the final texture and flavor.
What are the emerging trends in home sourdough baking?
Current trends include experimenting with ancient grains (like spelt or einkorn) for different flavors and nutritional profiles, incorporating unique additions like seeds, herbs, and dried fruits, and exploring advanced shaping and scoring techniques for highly artistic loaves. There's also a growing interest in no-knead sourdough methods for simplified processes.
Now that you have the ultimate guide on how to make sourdough bread at home, it's time to roll up your sleeves and get baking. Embrace the process, learn from each loaf, and soon you'll be enjoying the incredible aroma and taste of your very own artisan sourdough. Your kitchen (and your taste buds) will thank you!

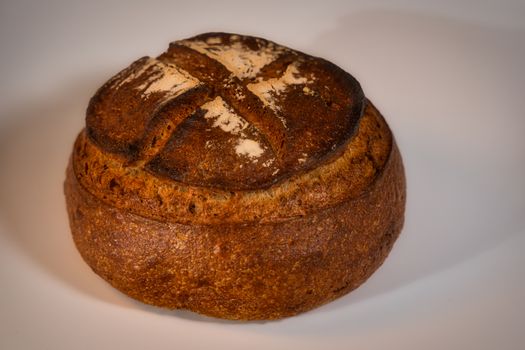 Photo: Travel with Lenses / Pexels
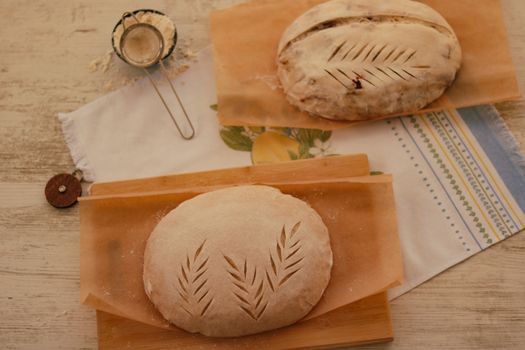 Photo: Feyza Daştan / Pexels
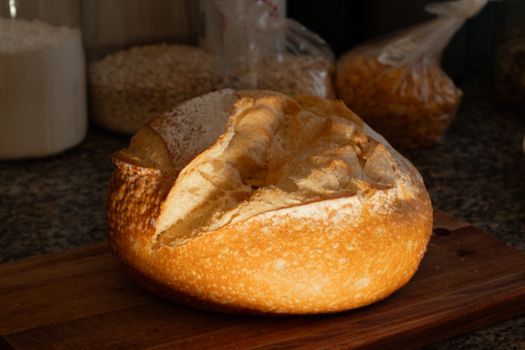 Photo: Giovanna Kamimura / Pexels
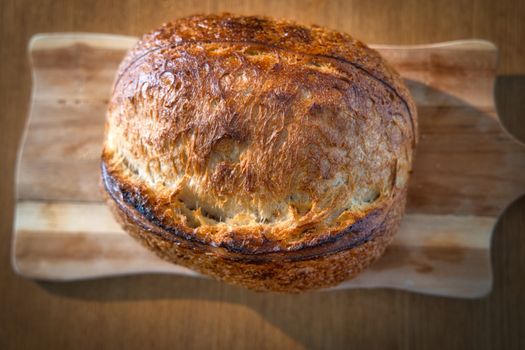 Photo: Travel with Lenses / Pexels