
How to Make Sourdough Bread at Home: Your Ultimate Guide
Transform your kitchen into an artisanal bakery and create incredible sourdough loaves with confidence.
Start Baking Today!Key Takeaways
- ✓ Sourdough relies on a live fermented starter, not commercial yeast.
- ✓ Patience is key; the process takes time but yields superior flavor.
- ✓ High-quality flour and water are fundamental ingredients.
- ✓ Mastering a few basic techniques will lead to consistent results.
How It Works
Ensure your sourdough starter is active and bubbly before beginning. A well-fed starter is crucial for successful leavening.
Combine flour and water, allowing them to rest and hydrate. This step, called autolyse, develops gluten naturally and improves dough extensibility.
Allow the dough to ferment, performing several 'stretch and folds' to build strength. Gently shape the dough into its final form before proofing.
Bake in a preheated Dutch oven for a crispy crust and soft interior. The trapped steam creates the ideal environment for a perfect oven spring.
The Foundation: Understanding Your Sourdough Starter
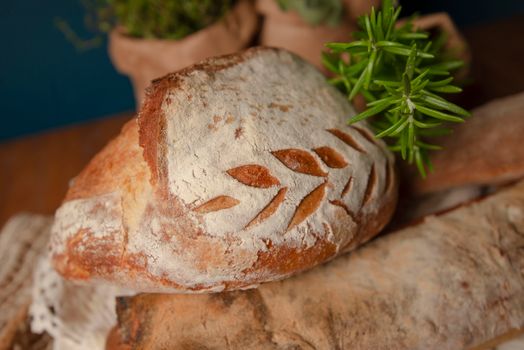 Photo: Natalia Olivera / Pexels
Mastering the Dough: Mixing, Autolyse, and Bulk Fermentation
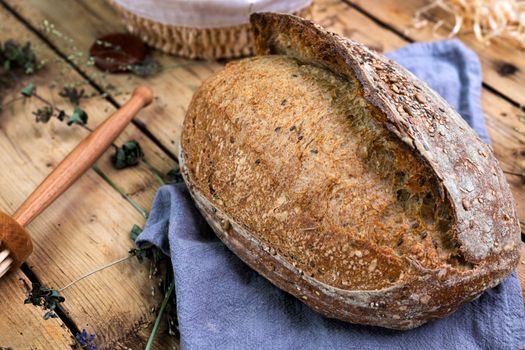 Photo: Jana Ohajdova / Pexels
Shaping, Proofing, and Baking Your Artisanal Loaf
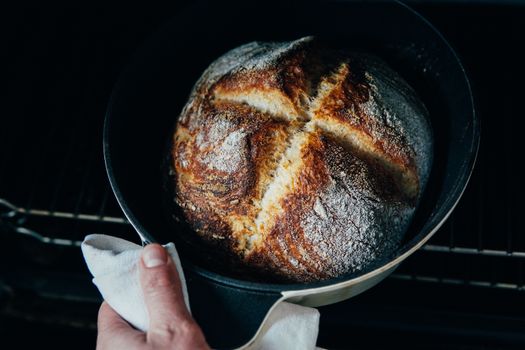 Photo: Elle Hughes / Pexels
Essential Tips and Common Pitfalls to Avoid
 Photo: Elle Hughes / Pexels
Comparison
| Feature | Sourdough (Homemade) | Commercial Yeast Bread | Store-bought Sourdough |
|---|---|---|---|
| Leavening Agent | Wild Yeast & Bacteria (Starter) | Commercial Baker's Yeast | Often Commercial Yeast + Sourdough Flavoring |
| Flavor Profile | Complex, Tangy, Deeply Aromatic | Mild, Yeasty, Simple | Mildly Tangy, Less Complex |
| Digestion | Easier due to fermentation | Can be heavier for some | Varies, often less digestible than true sourdough |
| Process Time | Long (12-24+ hours) | Short (2-4 hours) | Short (factory production) |
| Crust & Crumb | Crispy crust, open, chewy crumb | Softer crust, tighter, even crumb | Varies, often softer crust, denser crumb |
| Cost to Make | Low (flour, water) | Very Low (flour, water, yeast) | High (premium pricing) |
| Satisfaction | ✓ | ✗ | ✓ |
What Readers Say
"This guide completely demystified how to make sourdough bread at home for me! My first loaf was a revelation – perfectly crusty and chewy. I never thought I could achieve this quality in my own kitchen."
Sarah J. · Portland, OR"Following these instructions, my sourdough starter finally became consistently active. The detailed steps for bulk fermentation and shaping made all the difference. Highly recommend for any aspiring home baker."
Mark T. · Austin, TX"I've tried several sourdough recipes, but this one truly delivered. My bread had an incredible open crumb and a fantastic tangy flavor, just like from a professional bakery. My family can't get enough!"
Emily R. · Denver, CO"The guide is very thorough, although it took me a couple of tries to get the shaping just right. The tips on avoiding common pitfalls were particularly helpful. My loaves are getting better every time."
David L. · Chicago, IL"As a busy mom, the cold proofing technique was a game-changer. I can fit baking into my schedule without sacrificing quality. Learning how to make sourdough bread at home has become a cherished ritual."
Jessica M. · Seattle, WAFrequently Asked Questions
What is the most common reason my sourdough bread doesn't rise?
The most common reason for a flat sourdough loaf is an inactive or weak starter. Ensure your starter is consistently doubling in size within 4-6 hours after feeding, showing plenty of bubbles, and smelling pleasantly sour before you begin baking. Ambient temperature also plays a significant role; colder temperatures slow down fermentation, requiring more time.
Is making sourdough bread at home difficult for beginners?
While sourdough baking has a reputation for being challenging, it's entirely achievable for beginners with patience and a good guide. The key is understanding the process and learning to read your dough. Don't be discouraged by initial imperfections; every loaf is a learning experience, and the rewards are well worth the effort.
How do I store my sourdough starter when I'm not baking?
For infrequent bakers, store your sourdough starter in the refrigerator. Feed it once a week by discarding most of it and feeding it fresh flour and water. Before baking, take it out and feed it 1-2 times at room temperature over 12-24 hours until it's active and bubbly again.
Is homemade sourdough bread more expensive than store-bought?
No, homemade sourdough bread is significantly more cost-effective than artisanal store-bought loaves. The primary ingredients are just flour and water, which are very inexpensive. While there's an initial investment in a Dutch oven or banneton, these are one-time purchases that pay for themselves quickly.
How does sourdough compare to regular yeast bread in terms of health benefits?
Sourdough bread is often considered more digestible than regular yeast bread due to the long fermentation process. The wild yeasts and bacteria break down complex carbohydrates and phytic acid, which can improve nutrient absorption and reduce digestive discomfort for some individuals. It also tends to have a lower glycemic index.
Who should try making sourdough bread at home?
Anyone who enjoys baking, appreciates artisanal food, or is looking for a rewarding culinary hobby should try making sourdough bread at home. It's particularly appealing to those interested in natural leavening, unique flavors, and a more hands-on approach to food preparation.
What are the risks of eating sourdough bread made with an old starter?
There are generally no significant health risks associated with eating bread made from an old or neglected sourdough starter, as long as it doesn't show signs of mold. However, an old, unfed starter will be very weak, resulting in a flat, dense, and potentially unpalatable loaf. The main risk is a failed bake, not foodborne illness.
What are the future trends in home sourdough baking?
Future trends in home sourdough baking include increased experimentation with ancient grains and alternative flours (e.g., einkorn, spelt, kamut), a focus on hyper-local and regional flour sourcing, and the development of more automated or smart kitchen tools to assist with fermentation control. There's also a growing interest in sharing and preserving unique starter cultures.
Ready to transform your kitchen into a haven of artisanal aromas? With this comprehensive guide, you now have all the knowledge and confidence to embark on your sourdough journey. Start your starter today and discover the unparalleled joy of how to make sourdough bread at home.